The Most Frequently Asked Questions About Sealing Wax Guns

We often receive questions about sealing wax guns, so we especially created this FAQ guide to cover all your common questions!
Whether you are a beginner or an experienced user, this guide will give you practical insights into the most frequently asked questions about making wax seals with a glue gun or sealing wax gun, helpful tips, essential safety measures, and other useful information.
Our goal here is to make this FAQ guide the most helpful resource you can find for all your sealing wax gun questions!
Should I Use a Glue Gun/Sealing Wax Gun?
Glue Gun Basics and How to Use
Switching Wax Color
Temperature Control
Pro-Tips for Creating Perfect Wax Seals
Precautions and Maintenance
Should I Use a Glue Gun/Sealing Wax Gun?
What are the differences between using a sealing wax gun vs. a melting stove?
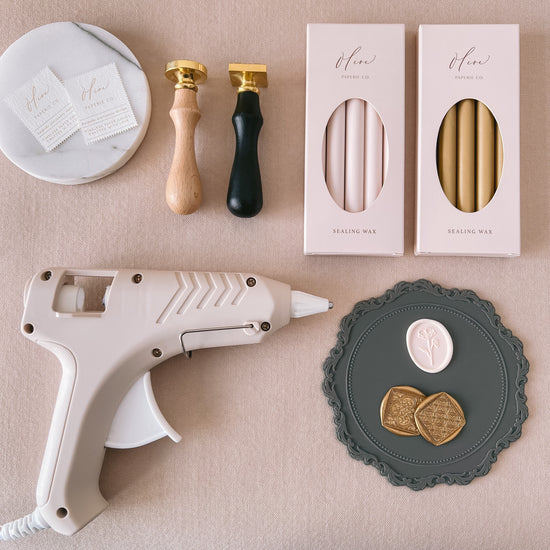
1. Sealing Wax Gun
Sealing wax sticks are melted directly inside the gun, allowing for a controlled application, suitable for making wax seals in bulk with consistent quality and precision.
2. Wax Melting Stove
Wax sticks or wax beads are melted in a metal spoon over a lighted candle and then poured onto the desired surface. This method requires more manual effort and skill to achieve consistent results.
Which one should I use?
It depends on the project and your objectives. If this is your first time making a large amount of wax seals for your wedding invitations, we recommend using a sealing wax gun for an efficient and mess-free experience. Whereas if you're making wax seals for fun, one might opt for the traditional method of using a wax stove.

What are the advantages of using a sealing wax gun?
1. Precision and Control
It provides precise control over the amount and flow of sealing wax dispensed onto a project surface.
2. Efficiency and Convenience
Its continuous melting feature allows for an efficient melting process and smooth operation, making it a better tool for making wax seals in bulk.
3. Consistency
It makes it easier to achieve beautiful wax seals with consistent results in the wax seal's shape, edge thickness, and overall appearance.
4. Ease of Use
It is easy to use and requires minimal skills, making it accessible to both beginners and experienced users.
5. A Mess-Free Experience
The use of a sealing wax gun for controlled dispensing helps minimize mess, ensures a cleaner application process, and avoids mishaps.
Glue Gun Basics and How to Use
How to use a glue gun/sealing wax gun?
1. Plug in and turn on your sealing wax gun
2. Insert 2 sealing wax sticks into the chamber
3. Wait 2-3 minutes for the wax to melt
4. Aim the nozzle on your project surface and gently squeeze the trigger to dispense melted wax
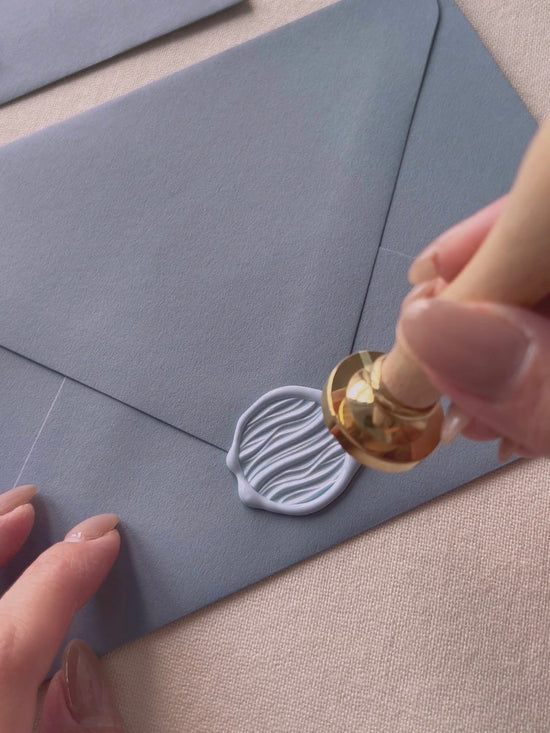
5. Steadily press your wax seal stamp into the sealing wax
6. Let the wax seal cool and dry completely before removing your wax stamp
When using your sealing wax gun, it's important to prioritize safety. Always make sure that it is turned off when not in use.

What type of sealing wax is compatible with my wax gun?
When choosing sealing wax sticks, make sure to check the size of your glue/wax gun chamber. There are generally two sizes - 7mm and 11mm.
Opt for high quality sealing wax sticks that are formulated to melt evenly and create durable wax seals that are safe for mailing.

How long does it take for the sealing wax to melt?
The time it takes for the sealing wax stick to melt varies based on several factors.
These factors include the glue/wax gun's power (watts), temperature setting, if applicable, and formulation of the sealing wax, all of which can affect the melting time.
Generally, it takes only a few minutes for the sealing wax to fully melt and become ready for dispensing.
As a rough estimate, it may take 2 to 5 minutes for the sealing wax to be sufficiently melted and ready to use.

What is the recommended drying time?
The drying time varies depending on factors such as wax temperature, formulation of the sealing wax, temperature of your wax stamp's surface, and the room temperature where you are operating the tool.
It is recommended that you allow the wax seal to sit undisturbed until it is fully dried and hardened.
Pro-tip: Chill your wax stamp on ice in between every few uses to speed up the process significantly. Make sure to wipe the stamp dry before stamping.

Switching Wax Color
How to switch wax colors in a sealing wax gun?
Clear glue sticks are a convenient solution for changing colors on your sealing wax gun.
This method helps minimize the wastage of sealing wax sticks and ensures a clean color transition.
How to use:
Simply insert one glue stick into your sealing wax gun and dispense the entire stick before inserting your color wax stick.
Temperature Control
What is the ideal temperature and how to control it for best results?
Temperature control and preventing your sealing wax from overheating are the most crucial elements for creating flawless wax seals with a smooth texture and an even finish.
Opting for a glue gun or sealing wax gun with a low temperature setting makes it easier to attain optimal temperature to achieve desirable results.
It is important to highlight the significance of turning off the wax gun whenever it's not in use, particularly if it is going to be left idle for over a minute or two. By doing so, we can prevent the continuous heating of the wax inside the chamber, which can lead to overheating and the formation of undesirable air bubbles.
It's important to note that different brands and models may have different temperature settings and we recommend a temperature range between 100°C and 130°C.

Pro-Tips for Creating Perfect Wax Seals
How to avoid air bubbles and imperfections?
1. Ensure a clean nozzle
Ensure the nozzle is clean and free of any residue before using it to facilitate a smooth and steady wax flow.
2. Ensure wax is sufficiently melted
Sealing wax that is not sufficiently heated will lead to uneven edges and texture, as well as wrinkles on the wax seal's surface.
3. Avoid overheating
Overheating can cause the wax to become runny, leading to a thin wax seal with undefined and flat edges and causing air bubbles.

4. Controlled application
Prepare a clean and flat surface to work on. Keep the nozzle close to the project surface and stably dispense the sealing wax, avoiding sudden or jerky movements.
5. Use high-quality sealing wax
Low-quality sealing wax may contain impurities that can lead to imperfections in your wax seals, uneven texture and an undefined imprint.
6. Practice
If you're new to using a sealing wax gun, it's best to practice on spare materials or a silicone mat first. This will help you become familiar with the tool's operation and refine your technique.

Precautions and Maintenance
How do I clean the sealing wax residue?
When you have finished making wax seals, turn off the sealing wax gun and promptly wipe away any wax residue from the nozzle while it is still warm; this will ensure easy removal.
Are there any safety precautions I should take?
- Ensure a clean and well-ventilated area and keep it away from any flammable materials.
- Always remember to turn off the sealing wax gun when not in use to prevent accidental burns or overheating.
- Avoid direct contact with the nozzle and melted sealing wax as they can be extremely hot.
- If you are not using a low-temperature glue gun or sealing wax gun, it is important to be mindful of the temperature settings to avoid risks of burning accidents and ensure safe operation.
Closing Remarks: All About Sealing Wax Guns
We hope this guide has covered all your questions about sealing wax guns.
Whether you are new to wax sealing or an experienced crafter, we hope you've found useful tips and insights to enhance your experience.
Keep exploring and experimenting with your wax seals, and don't hesitate to refer to this guide whenever you need help!
To discover more ideas and inspirations, please follow us on Instagram and Pinterest @OlivePaperieCo.