Wax Seal Beginners Guide - Everything You Need To Know

Wax seals are not just old-school relics. They are perfect for adding sophistication and a personal touch to any paper stationery, wedding invitations and wedding stationery. With these wax seal tips and tricks, you can make your project shine.
Whether you are a wax seal beginner or an experienced wax sealer, this step-by-step wax sealing guide will help you create beautiful wax seals with ease!
The Ultimate Wax Seal Beginners Guide
Get Your Wax Seal Making Tools Ready!
Before we embark on our wax seal adventure, let's gather the tools you will need:
1. Wax Seal Stamp
Choose a wax stamp design or customized wax seal stamp that reflects your style or suits the occasion
2. Sealing Wax
You've got options - sealing wax sticks or sealing wax beads (explained in Step 1)
3. Wax Melting Tools
Sealing wax gun or traditional setup of a wax stove with a melting spoon and candle (explained in Step 2)
4. Parchment Paper or a Silicone Mat
A silicone mat or non-stick surface to keep things neat!

Wax Seal Making Guide - Easy Step-by-Step
Step 1: Choose Your Sealing Wax
Ready to dive in? First, choose the type of sealing wax that suits your DIY wax seal project:
Sealing Wax Sticks
Modern and easy to use, the sealing wax stick, which comes in various colors, is used with a sealing wax gun / glue gun. This sealing wax method is recommended if you make large quantities of wax seals.
Note: For a sealing wax stick of 0.44" in diameter & 5.3", you can make approximately 10-12 1-inch wax seals.
Sealing Wax Beads
These small pellets can be melted in a spoon with a wax stove to create wax seals and come in a wide range of colors, perfect for various projects and mixing different sealing wax colors.
Note: For a standard wax bead size, you need approximately 2-3 beads per wax seal.

Step 2: Set Up Your Workspace
Prepare your workspace by having sufficient space for your tools. If you are using a wax stove with a candle, make sure the space is well ventilated.


Low-Temperature Sealing Wax Gun / Glue Gun for Sealing Wax Sticks
Anyone can use a sealing wax gun regardless of their wax sealing experience. The process is quite simple if you're wondering how to use it to melt wax sticks precisely and efficiently.
First, insert a wax stick into the sealing wax gun and heat it up. Then, squeeze the trigger to apply the melted wax onto your project surface. The sealing wax gun is perfect for bulk wax seal making. It is an excellent tool for DIY wax seal projects such as wedding invitations.
Wax Stove for Sealing Wax Beads
It is ideal for beginners and experienced wax sealers. Using a wax stove for melting wax beads with a spoon and candle is easy. Put the wax beads in the spoon, hold it over the flame until it melts, and then pour it onto your project surface. It is an excellent option for blending various sealing wax colors.
⚠️ SAFETY IS IMPORTANT!
Remember, safety is essential when working with open flames or heated tools, regardless of your experience level.
Step 3: Prepare Your Wax Stamp
Choose your wax seal stamp and attach it to a handle if necessary.
Step 4: Melt the Sealing Wax
Use a wax stove or sealing wax gun/glue gun to melt the sealing wax.
Step 5: Dispense/Pour Sealing Wax onto the Project Surface
Gently pour or dispense the melted wax onto your project surface/silicone mat. For beginners, it might take a few tries before you get the hang of using the right amount of sealing wax for your wax stamp.
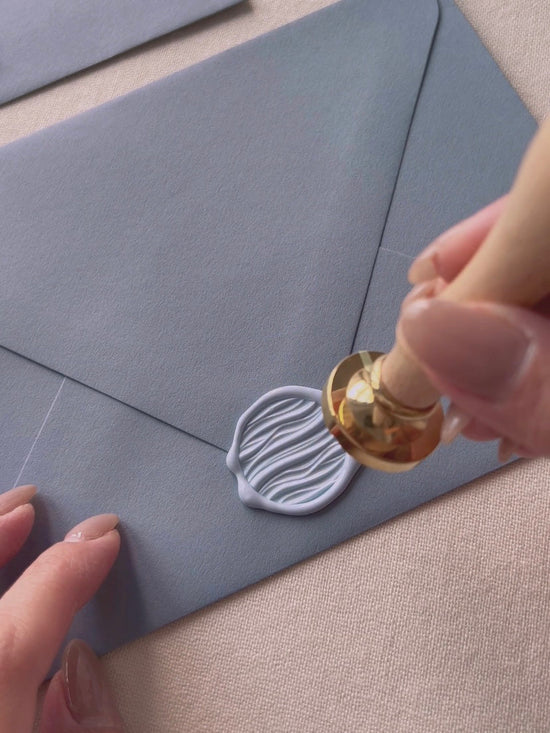
Step 6: Stamp the Wax
Steadily press the wax seal stamp into the melted wax. Allow the wax to cool for at least 10 seconds.
Step 7: Release the Seal
Carefully lift the wax stamp to reveal your beautiful wax seal. Admire your handiwork!
💡 PRO TIP: Use a cold stamp for better efficiency.
Cool the wax stamp on an ice cube, dry it with a clean cloth, and press it into the melted sealing wax.
Maintenance and Care: Keep Your Tools in Top Shape
To ensure the longevity of your wax seal tools, wipe them clean after each use and store them in a cool, dry place.

Conclusion: Unlock Your Creativity
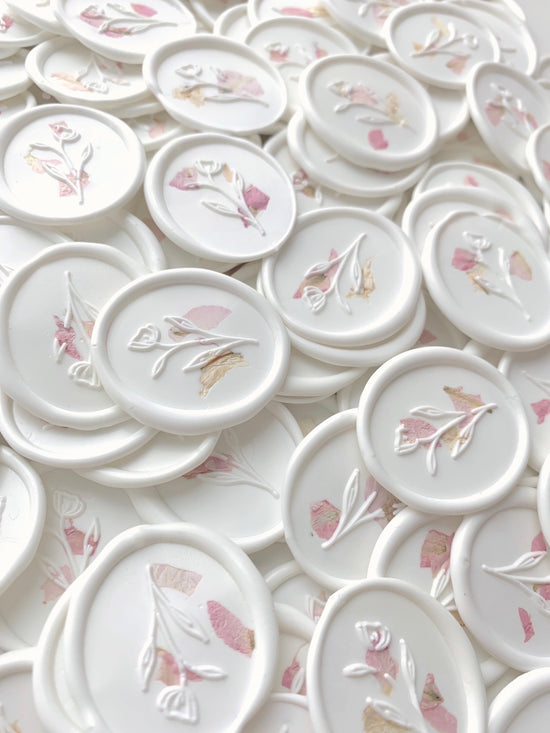
Creating wax seals is a delightful and fun way to add an elegant touch to your stationery for special occasions.
Wax seals not only enhance the decorative appeal of your stationery but also add your personal touch and show that you have made extra effort to make it special for the recipient.
Whether designing wedding invitations, letter seals, or wax seal DIY projects, this wax seal making step-by-step guide provides the inspiration and information you need to begin your wax sealing journey.♡
We hope you found this blog post helpful. Stay tuned for more crafting and wax sealing tips by following us on Instagram and Pinterest @OlivePaperieCo.
Happy sealing!